
How You Can Repair A Spalling Concrete Ceiling In 3 Simple Steps

Spalling concrete ceiling repair is a relatively easy DIY project that you can complete in just a few simple steps. Spalling concrete is caused by water damage, freeze-thaw cycles, or poor concrete mix. It appears as flaking or scaling on the surface of the concrete and can eventually lead to structural damage if left unaddressed.
In this article, we’ll show you how to repair a spalling concrete ceiling in three easy steps.
What is spalling concrete?
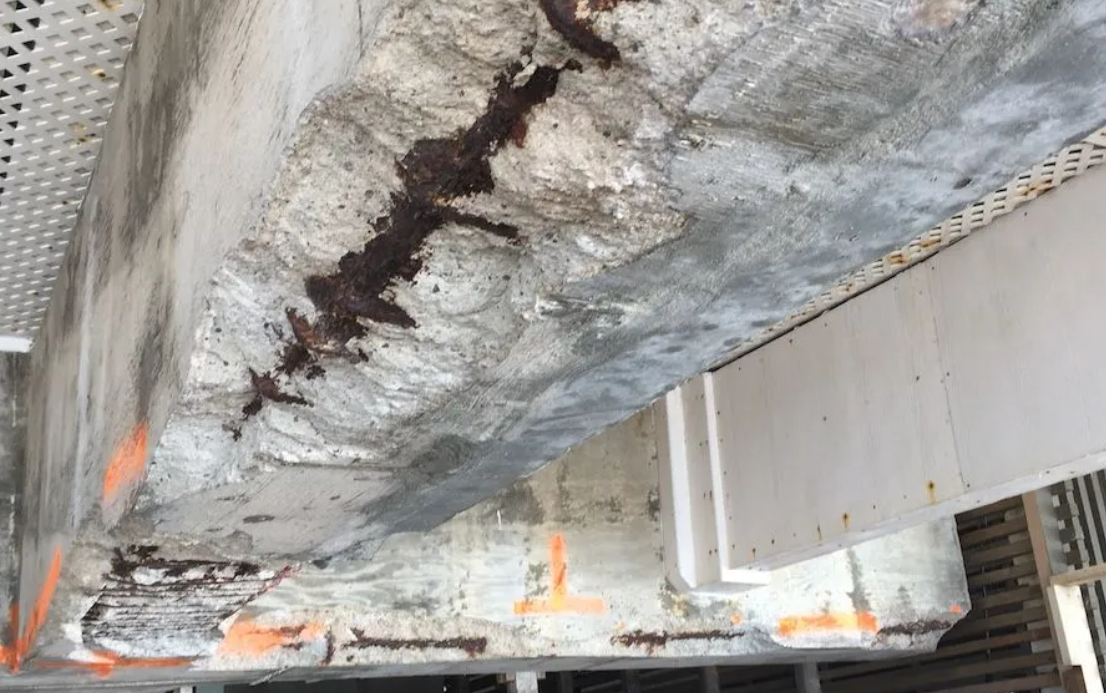
Spalling concrete is a type of damage that appears as flaking or scaling on the surface of the concrete. It is caused by water damage, freeze-thaw cycles, or poor concrete mix. If left unaddressed, spalling concrete can eventually lead to structural damage. And spalled concrete repair cost depends on the severity of the spalling, the location and the size of the repair area.
The cause of spalling concrete
There are several causes of spalling concrete, but the most common is water damage, freeze-thaw cycles, and poor concrete mix.
Water damage is the most common cause of spalling concrete. When water seeps into the concrete, it expands and puts pressure on the concrete.
Freeze-thaw cycles are another common cause of spalling concrete. This can cause the surface of the concrete to flake or scale.
Poor concrete mix is another common cause of spalling concrete. When the ratio of water to cement is too high, the resulting concrete is weak and susceptible to damage.
How to repair your spalling concrete ceiling
Few simple steps to repair your ceiling:
Step 1: Remove all loose pieces of concrete from the ceiling using a chisel and hammer. Be sure to wear safety goggles to protect your eyes from flying debris.
Step 2: Clean the ceiling with a wire brush to remove any dirt or debris.
Step 3: Apply a bonding agent to the ceiling with a paintbrush. This will help the repair mortar adhere to the ceiling.
Step 4: Mix together repair mortar according to the instructions on the package.
Step 5: Apply the repair mortar to the ceiling with a trowel, filling in all the cracks and holes.
Step 6: Allow the repair mortar to dry for 24 hours before painting or staining. This is the final step of spalling concrete ceiling repair. For more information visit our Website.